
Patio Rivet Installation: 7 Proven Steps for Secure Repair
Patio Rivet Installation is a fundamental skill for anyone looking to extend the life and enhance the safety of their outdoor furniture. Over time, the constant exposure to elements, regular use, and even accidental impacts can cause rivets in patio chairs, tables, and other pieces to loosen or break. This guide provides an authoritative, step-by-step approach to mastering this essential repair, ensuring your outdoor living space remains both functional and beautiful.
Understanding how to properly perform a patio rivet installation can save you significant money on replacements or professional repairs. It empowers you to tackle common issues with confidence, transforming wobbly chairs and unstable tables into sturdy, reliable fixtures once more. We will walk you through everything from selecting the right tools and materials to executing a flawless installation, making this a truly rewarding DIY project.
Key Takeaways
- Master the essential tools and techniques required for a successful Patio Rivet Installation.
- Learn to identify the correct rivet types for various patio furniture materials, ensuring a durable and compatible repair.
- Follow 7 proven steps for safely removing old rivets and installing new ones, guaranteeing a secure fix.
- Discover expert tips for troubleshooting common issues and maintaining your newly repaired furniture for lasting performance.
Understanding Patio Rivet Installation: Why Rivets Matter
Rivets are small but mighty fasteners, crucial for the structural integrity of many patio furniture pieces, especially those made from aluminum. Unlike screws, which can loosen over time due to vibration or corrosion, rivets create a permanent, strong bond. This makes them ideal for outdoor applications where durability and resistance to the elements are paramount. A proper Patio Rivet Installation ensures longevity.
The common uses for rivets in patio furniture repair are extensive. They are frequently employed to reattach loose frame components, secure sling rails that have come detached, and fix wobbly joints on aluminum chairs and tables. Essentially, wherever a strong, tamper-resistant, and permanent connection is needed, rivets are the fastener of choice. This ensures your furniture remains safe and stable for years.
Why Choose Rivets Over Screws for Outdoor Patio Applications?
When considering fasteners for outdoor patio applications, rivets often present a superior choice compared to screws. Rivets offer exceptional resistance to vibration loosening, which is common with outdoor furniture due to movement and weather. Once installed, they provide a flush, tamper-resistant joint that doesn’t strip out of softer materials like aluminum, a frequent issue with screws. This permanence makes Patio Rivet Installation a more durable and secure solution for furniture exposed to the elements.
Furthermore, rivets are less prone to corrosion issues, especially when using aluminum rivets with aluminum frames, preventing galvanic corrosion that can occur with dissimilar metals. They create a cleaner aesthetic without protruding screw heads. For these reasons, mastering Patio Rivet Installation is key to truly robust patio furniture repair.
Essential Tools for Your Patio Rivet Installation Project
A successful Patio Rivet Installation project hinges on having the right tools. While the process is straightforward, attempting it without the proper equipment can lead to frustration and subpar results. Gathering these items before you begin will streamline your repair and ensure a professional finish. Investing in quality tools will pay off in the long run.
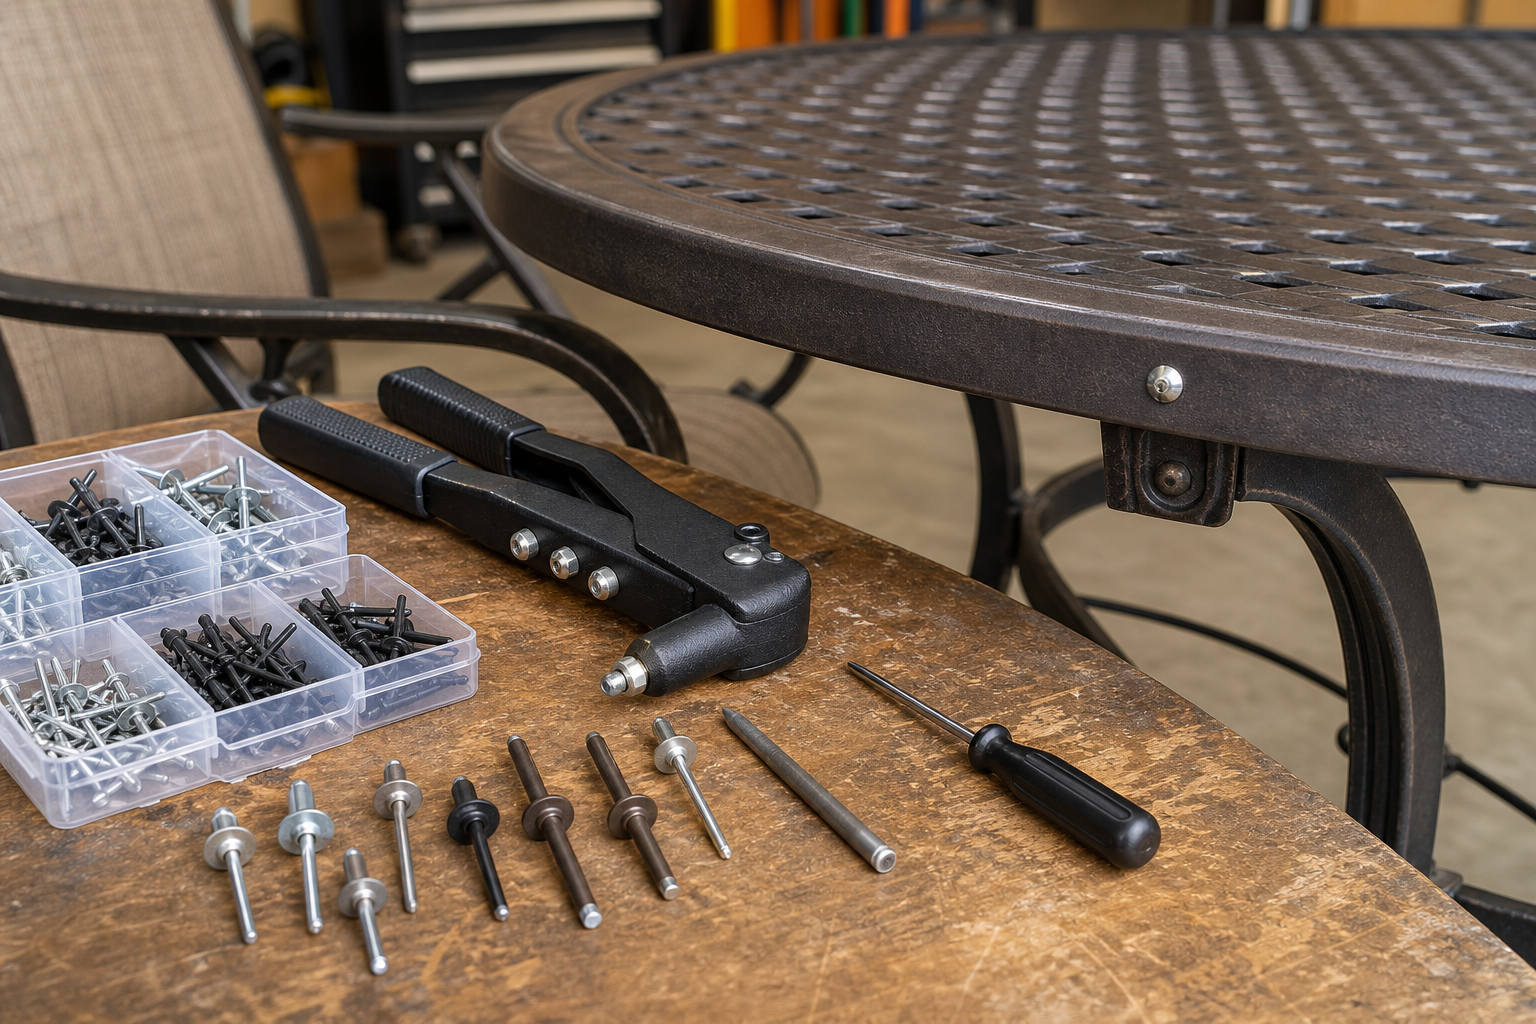
The primary tool you’ll need is a rivet gun, also known as a pop rivet tool. This device is designed to pull the mandrel of the rivet, expanding its blind side and creating a secure joint. You will also require an electric drill with appropriately sized drill bits for removing old rivets and preparing new holes. A center punch is useful for marking drilling spots accurately, and safety glasses are absolutely mandatory to protect your eyes from flying debris.
For stubborn old rivets, a hammer might be needed.
Best Brands for Patio Rivet Installation Kits
When selecting tools for your Patio Rivet Installation, opting for reputable brands can make a significant difference in ease of use and durability. Brands like Stanley, Arrow, and Astro Pneumatic offer reliable rivet guns and kits that are well-suited for DIY patio furniture repair. These kits often include a variety of rivet sizes, ensuring you have the right components for different repair needs. Always check reviews and product specifications to match tools to your specific project requirements.
For drill bits, brands like DeWalt, Bosch, and Milwaukee are known for their quality and precision, which is crucial for clean rivet removal and hole preparation. Remember, the quality of your tools directly impacts the quality and longevity of your Patio Rivet Installation. Don’t compromise on safety gear either; a good pair of safety glasses is non-negotiable.
The 7 Proven Steps for Secure Patio Rivet Installation
Executing a precise Patio Rivet Installation involves a series of methodical steps. Following this proven sequence will ensure a strong, lasting repair for your patio furniture. Each step is crucial for the overall success and durability of the fix, transforming wobbly or broken pieces into sturdy, functional items once again.
Before you begin, ensure your workspace is clean, well-lit, and stable. Having all your tools and materials within reach will make the process smoother and more efficient. Remember, patience and attention to detail are your best allies in achieving a professional-grade Patio Rivet Installation.
Step 1: Safety First for Patio Rivet Installation
Before any work begins, prioritize safety. Always wear safety glasses to protect your eyes from metal shards when drilling out old rivets or from the snapping mandrel during installation. Gloves can prevent cuts and scrapes. Ensure your work area is stable and clear of obstructions. Proper ventilation is also advisable if you’re using any lubricants or cleaning agents during your Patio Rivet Installation.
Step 2: Removing Old Rivets for Patio Rivet Installation
To replace a broken rivet on a patio table or chair, you must first remove the old one. Carefully drill out the old rivet’s head using a drill bit slightly larger than the rivet’s stem. Once the head is removed, the remaining shaft can usually be pushed or tapped out with a punch and hammer. Be gentle to avoid enlarging the existing hole or damaging the surrounding material. This careful removal is critical for a successful Patio Rivet Installation.
Step 3: Preparing the Surface
After removing the old rivet, clean the area thoroughly. Remove any debris, rust, or corrosion from the holes and the surrounding surfaces. Use a wire brush or sandpaper if necessary. Ensure the holes are perfectly aligned between the two pieces you intend to join. Misalignment can lead to a weak joint and complicate the Patio Rivet Installation process. Use clamps to hold the pieces firmly in place if needed.
Step 4: Choosing the Right Rivets for Patio Rivet Installation
Selecting the correct rivet type and size is paramount. For aluminum patio furniture, aluminum pop rivets are generally the best choice due to their corrosion resistance and compatibility with the base material, preventing galvanic corrosion. Ensure the rivet diameter matches your pre-drilled holes, and the grip range (the total thickness of the materials being joined) is appropriate. Stainless steel rivets can offer greater strength but must be used cautiously with aluminum.
Understanding the nuances of rivet types is crucial for a durable Patio Rivet Installation.
The difference between pop rivets and structural rivets for patio use lies primarily in their strength and application. Pop rivets (blind rivets) are common for general repairs, offering ease of installation from one side. Structural rivets, on the other hand, are designed for heavier-duty applications, providing a much stronger, more vibration-resistant joint. For most patio furniture repairs, standard aluminum pop rivets are sufficient and easier to work with, making them ideal for DIY Patio Rivet Installation.
Step 5: Proper Rivet Placement
Insert the chosen rivet into the prepared, aligned hole. The rivet head should sit flush against the surface of the material. Ensure that both pieces of the furniture are correctly positioned and held together securely, either by hand or with clamps, before proceeding. Any movement during this stage can compromise the alignment and the integrity of the final Patio Rivet Installation.
Step 6: Securing the Rivet with a Rivet Gun for Patio Rivet Installation
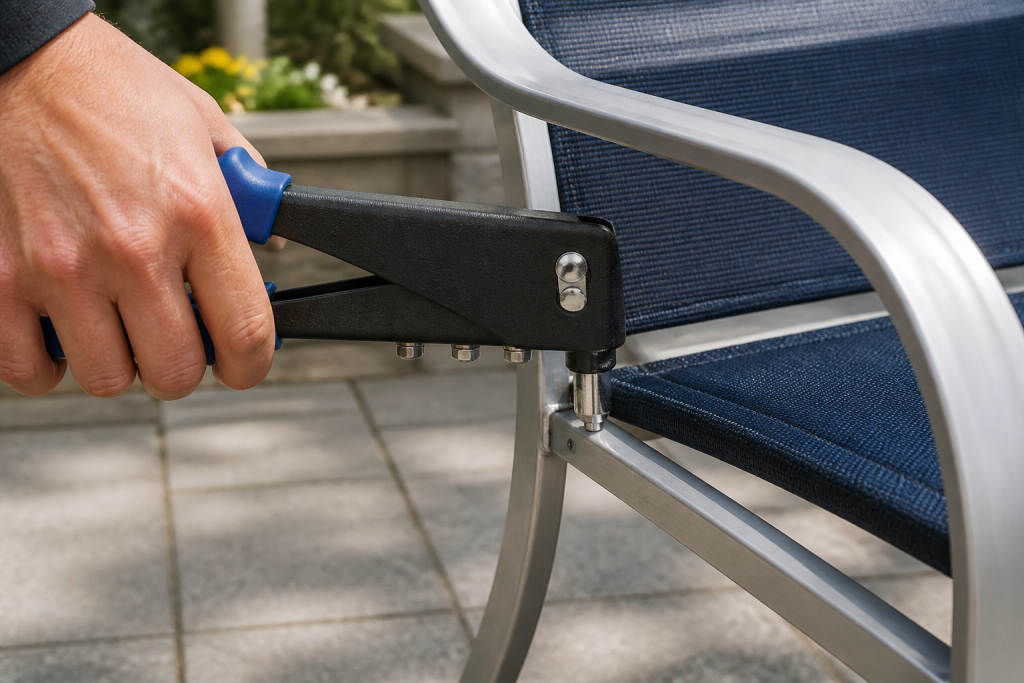
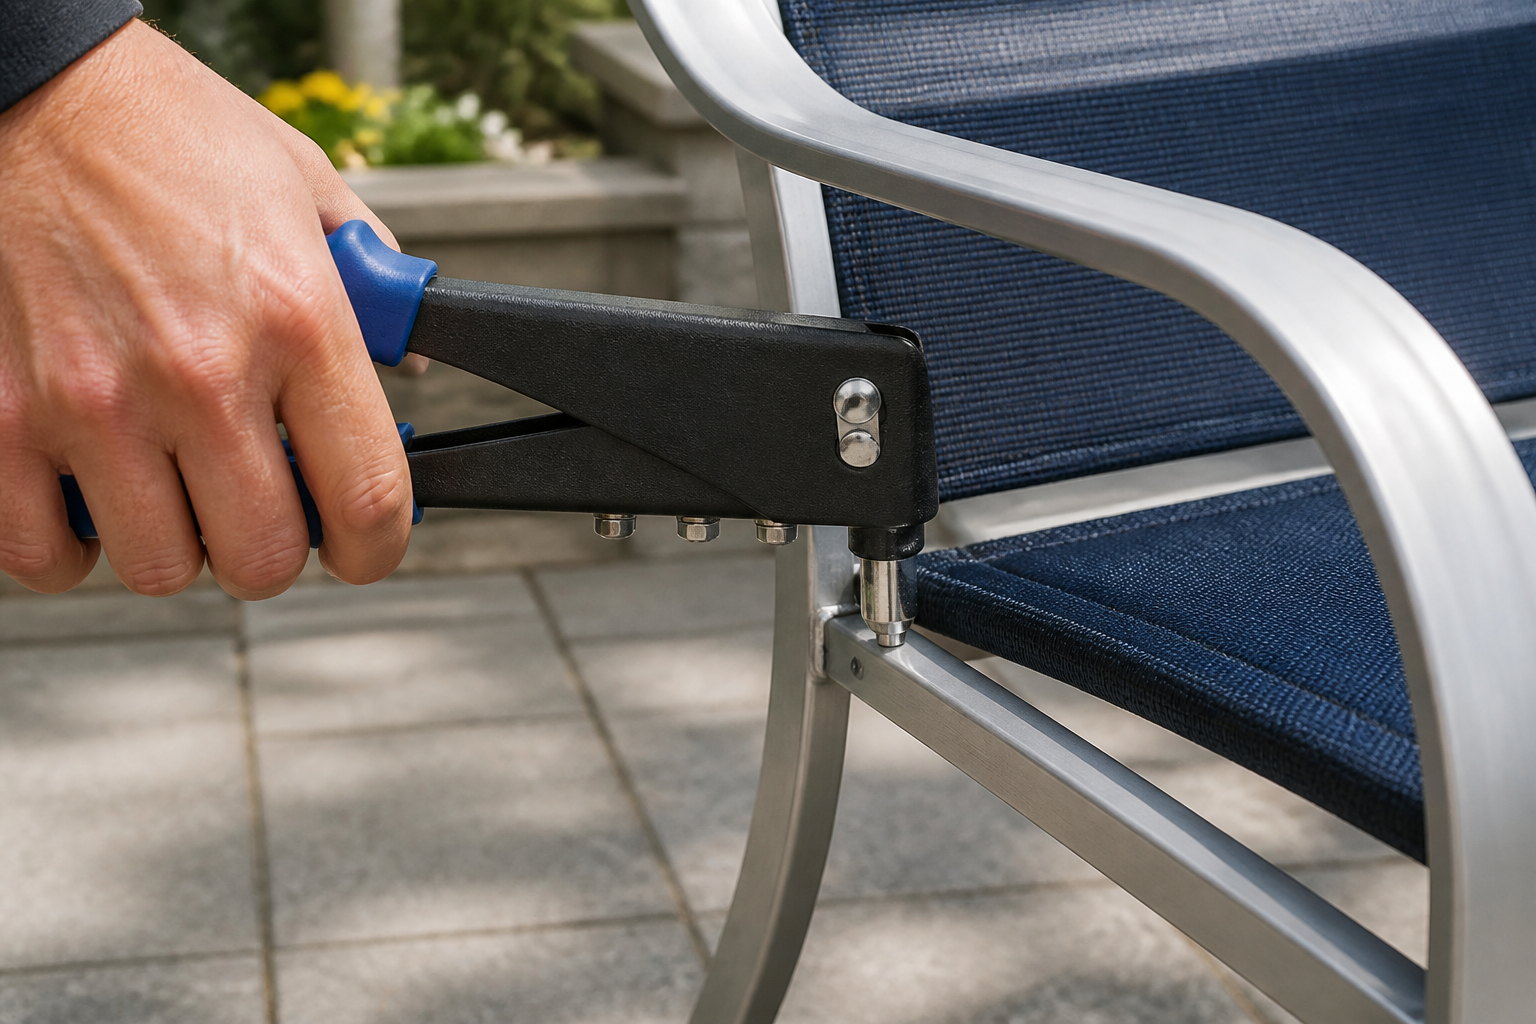
To properly install a rivet on aluminum patio chairs, insert the rivet gun’s nozzle over the rivet’s mandrel (the pin protruding from the rivet). Squeeze the handles of the rivet gun repeatedly. With each squeeze, the tool pulls the mandrel, causing the rivet body to expand on the blind side of the material, forming a secure head. Continue squeezing until the mandrel snaps off with an audible pop. This indicates a successful and tight Patio Rivet Installation.
Step 7: Final Checks and Maintenance
Once the rivet is installed, visually inspect the joint. It should be tight, with no gaps between the joined materials. Test the stability of the repaired furniture piece. For ongoing maintenance, periodically check all rivets on your patio furniture for any signs of loosening or corrosion. Addressing minor issues promptly can prevent more extensive repairs down the line. This proactive approach ensures the longevity of your Patio Rivet Installation.
Master Your Patio Rivet Installation with Chair Sling Store Parts
Ensure your patio furniture stands the test of time with our premium replacement parts and expert advice. Chair Sling Store offers everything you need for a secure and lasting repair.
Beyond the Basics: Advanced Patio Rivet Installation Scenarios
While the 7 steps cover most standard repairs, some situations might require a bit more thought. Understanding these advanced scenarios can help you tackle more complex projects with confidence. Whether it’s a larger structure or a unique material, the principles of secure fastening remain the same, but the execution might vary. A solid understanding of Patio Rivet Installation fundamentals prepares you for these challenges.
Can I Install Rivets on My Patio Awning Frame Myself?
Yes, you can often install rivets on your patio awning frame yourself, provided you have the right tools and follow proper safety procedures. Awning frames, frequently made of aluminum, use rivets similarly to patio furniture. Ensure you use appropriate rivet sizes and materials, such as aluminum rivets, suitable for outdoor exposure and the structural integrity of the awning. Always consult the awning’s manual for specific fastener recommendations before attempting a Patio Rivet Installation on such a structure.
What Should I Do If a Rivet Fails After Installation on My Patio Gate?
If a rivet fails after installation on your patio gate, it’s crucial to address it promptly to prevent further damage or safety hazards. First, identify the cause of the failure. Was the rivet too small, improperly installed, or subjected to excessive stress? Remove the failed rivet carefully, following the drilling steps outlined earlier. Before installing a new rivet, consider using a slightly larger diameter rivet if the hole has expanded, or a stronger material like stainless steel if appropriate.
Re-evaluate the stress points on the gate to ensure the new Patio Rivet Installation will hold securely.
Sourcing Your Patio Rivet Installation Supplies
Finding the right rivets and tools is a critical part of any successful repair. Knowing where to look can save you time and ensure you get quality components. From local hardware stores to specialized online retailers, options abound for your Patio Rivet Installation needs. Always prioritize quality and compatibility to ensure a lasting fix.
Where Can I Buy Rivets Specifically for Patio Furniture Repair?
You can buy rivets specifically for patio furniture repair at specialty hardware stores, online retailers, and general home improvement centers. For a wide selection of high-quality replacement parts, including various types and sizes of rivets, consider visiting Chair Sling Store. They often stock aluminum pop rivets, which are most common for this application. Ensure you select the correct diameter and grip range to match your existing holes and material thickness for a successful Patio Rivet Installation.
Where Can I Find a Tutorial Video for DIY Patio Rivet Installation?
Many online platforms, such as YouTube, offer a wealth of tutorial videos for DIY Patio Rivet Installation. Searching for terms like
What are the common uses for rivets in patio furniture repair?
Rivets are commonly used in patio furniture repair to reattach loose frames, secure torn sling rails, fix broken joints on aluminum chairs and tables, and replace existing failing fasteners. Their strong, permanent bond makes them ideal for structural repairs, especially for lightweight metal components where welding isn’t practical.
This ensures the longevity and stability of your outdoor pieces after a patio rivet installation.
How do you properly install a rivet on aluminum patio chairs?
To properly install a rivet on aluminum patio chairs, first, ensure the holes are clean and aligned. Insert the rivet into the prepared hole. Using a rivet gun, squeeze the handles repeatedly until the rivet’s mandrel snaps off, indicating a secure installation. The rivet will expand on the blind side, creating a tight, permanent joint. Always wear safety glasses during patio rivet installation.
What tools are required for a patio rivet installation project?
A successful patio rivet installation project requires a rivet gun (also known as a pop rivet tool), an electric drill with appropriately sized drill bits for removing old rivets and preparing new holes, a center punch to mark drilling spots, and safety glasses. Depending on the repair, you might also need clamps to hold pieces together and a hammer for tapping out stubborn old rivets.
Why choose rivets over screws for outdoor patio applications?
Rivets are often preferred over screws for outdoor patio applications due to their superior resistance to vibration loosening, corrosion, and theft. Once installed, rivets create a permanent, flush, and tamper-resistant joint that doesn’t strip out like screws can in softer aluminum. This permanence makes patio rivet installation a more durable and secure solution for furniture exposed to the elements.
What types of rivets are best suited for different patio materials?
For aluminum patio furniture, aluminum rivets are generally best suited due to their corrosion resistance and compatibility with the base material, preventing galvanic corrosion. Stainless steel rivets can also be used for stronger joints, especially in high-stress areas, but ensure they are compatible with aluminum to avoid reactions. For plastic components, plastic rivets or specialty metal rivets designed for softer materials might be considered, though metal rivets are primary for structural patio rivet installation.
Where can I buy rivets specifically for patio furniture repair?
You can buy rivets specifically for patio furniture repair at specialty hardware stores, online retailers like Chair Sling Store, and general home improvement centers. Look for aluminum pop rivets, as they are most common for this application. Ensure you select the correct diameter and grip range to match your existing holes and material thickness for a successful patio rivet installation.
How much does professional patio rivet installation cost?
The cost of professional patio rivet installation varies widely depending on the number of rivets needed, the complexity of the repair, the type of furniture, and your geographic location. It can range from a small service fee for a few rivets to a more substantial cost for extensive frame repairs. Many DIY enthusiasts find performing patio rivet installation themselves to be a cost-effective alternative.
Can I install rivets on my patio awning frame myself?
Yes, you can often install rivets on your patio awning frame yourself, provided you have the right tools and follow proper safety procedures. Awning frames, often made of aluminum, use rivets similarly to patio furniture. Ensure you use appropriate rivet sizes and materials (e.g., aluminum rivets) suitable for outdoor exposure and the structural integrity of the awning during your patio rivet installation project.
What are the steps for replacing a broken rivet on a patio table?
To replace a broken rivet on a patio table, first, carefully drill out the old rivet’s head using a drill bit slightly larger than the rivet’s stem. Once the head is removed, the remaining shaft can usually be pushed or tapped out. Clean the hole, then insert a new rivet and use a rivet gun to secure it firmly. This process is a key part of effective patio rivet installation.
Are there specific safety precautions for patio rivet installation?
Yes, specific safety precautions for patio rivet installation include always wearing safety glasses to protect against flying debris from drilling or snapping mandrels. Use gloves to protect your hands, and ensure your workspace is stable and well-lit. Be mindful of pinch points when operating the rivet gun. Proper ventilation is also advisable if you’re working with lubricants or cleaning agents.
Learn more from authoritative resources: Consumer Reports and HGTV.